
 Nederlands
 Deutsch
 Français
The most important parts of your inheritance plan are Security, Trust, and Safety. With Inheriti® by Safe Haven, you have piece of mind that your assets are well taken care of and will be ready when you need them most.
Why Can You Trust Inheriti®?

Multiple layered process
Inheriti® is a web3 platform built upon a three-layer distribution process:
- Blockchain
- Cold-storage
- Cloud
Patented protocols
Inheriti® has patented protocols in Europe, United States of America and pending patents in China (as of date March 13, 2022, see up to date information at our Safe Haven Patent Page).
Audited software
Red4Sec performed a whitebox audit, on December 28th of 2020, that proved no critical data is stored within the backend.
Continued auditing of Inheriti’s platform is underway by Intigriti (Europe’s #1 ethical hacking and bug bounty association) – for the next 12-months.
Since the launch of Inheriti®’s Community Edition, September 20th of 2020, there have been zero breaches or discrepancies between clients and the services provided by Safe Haven.
View our security audit report here: https://github.com/Safehaven-io/Inheriti/tree/master/Security
How to Set Up A Decentralized Inheritance Plan?
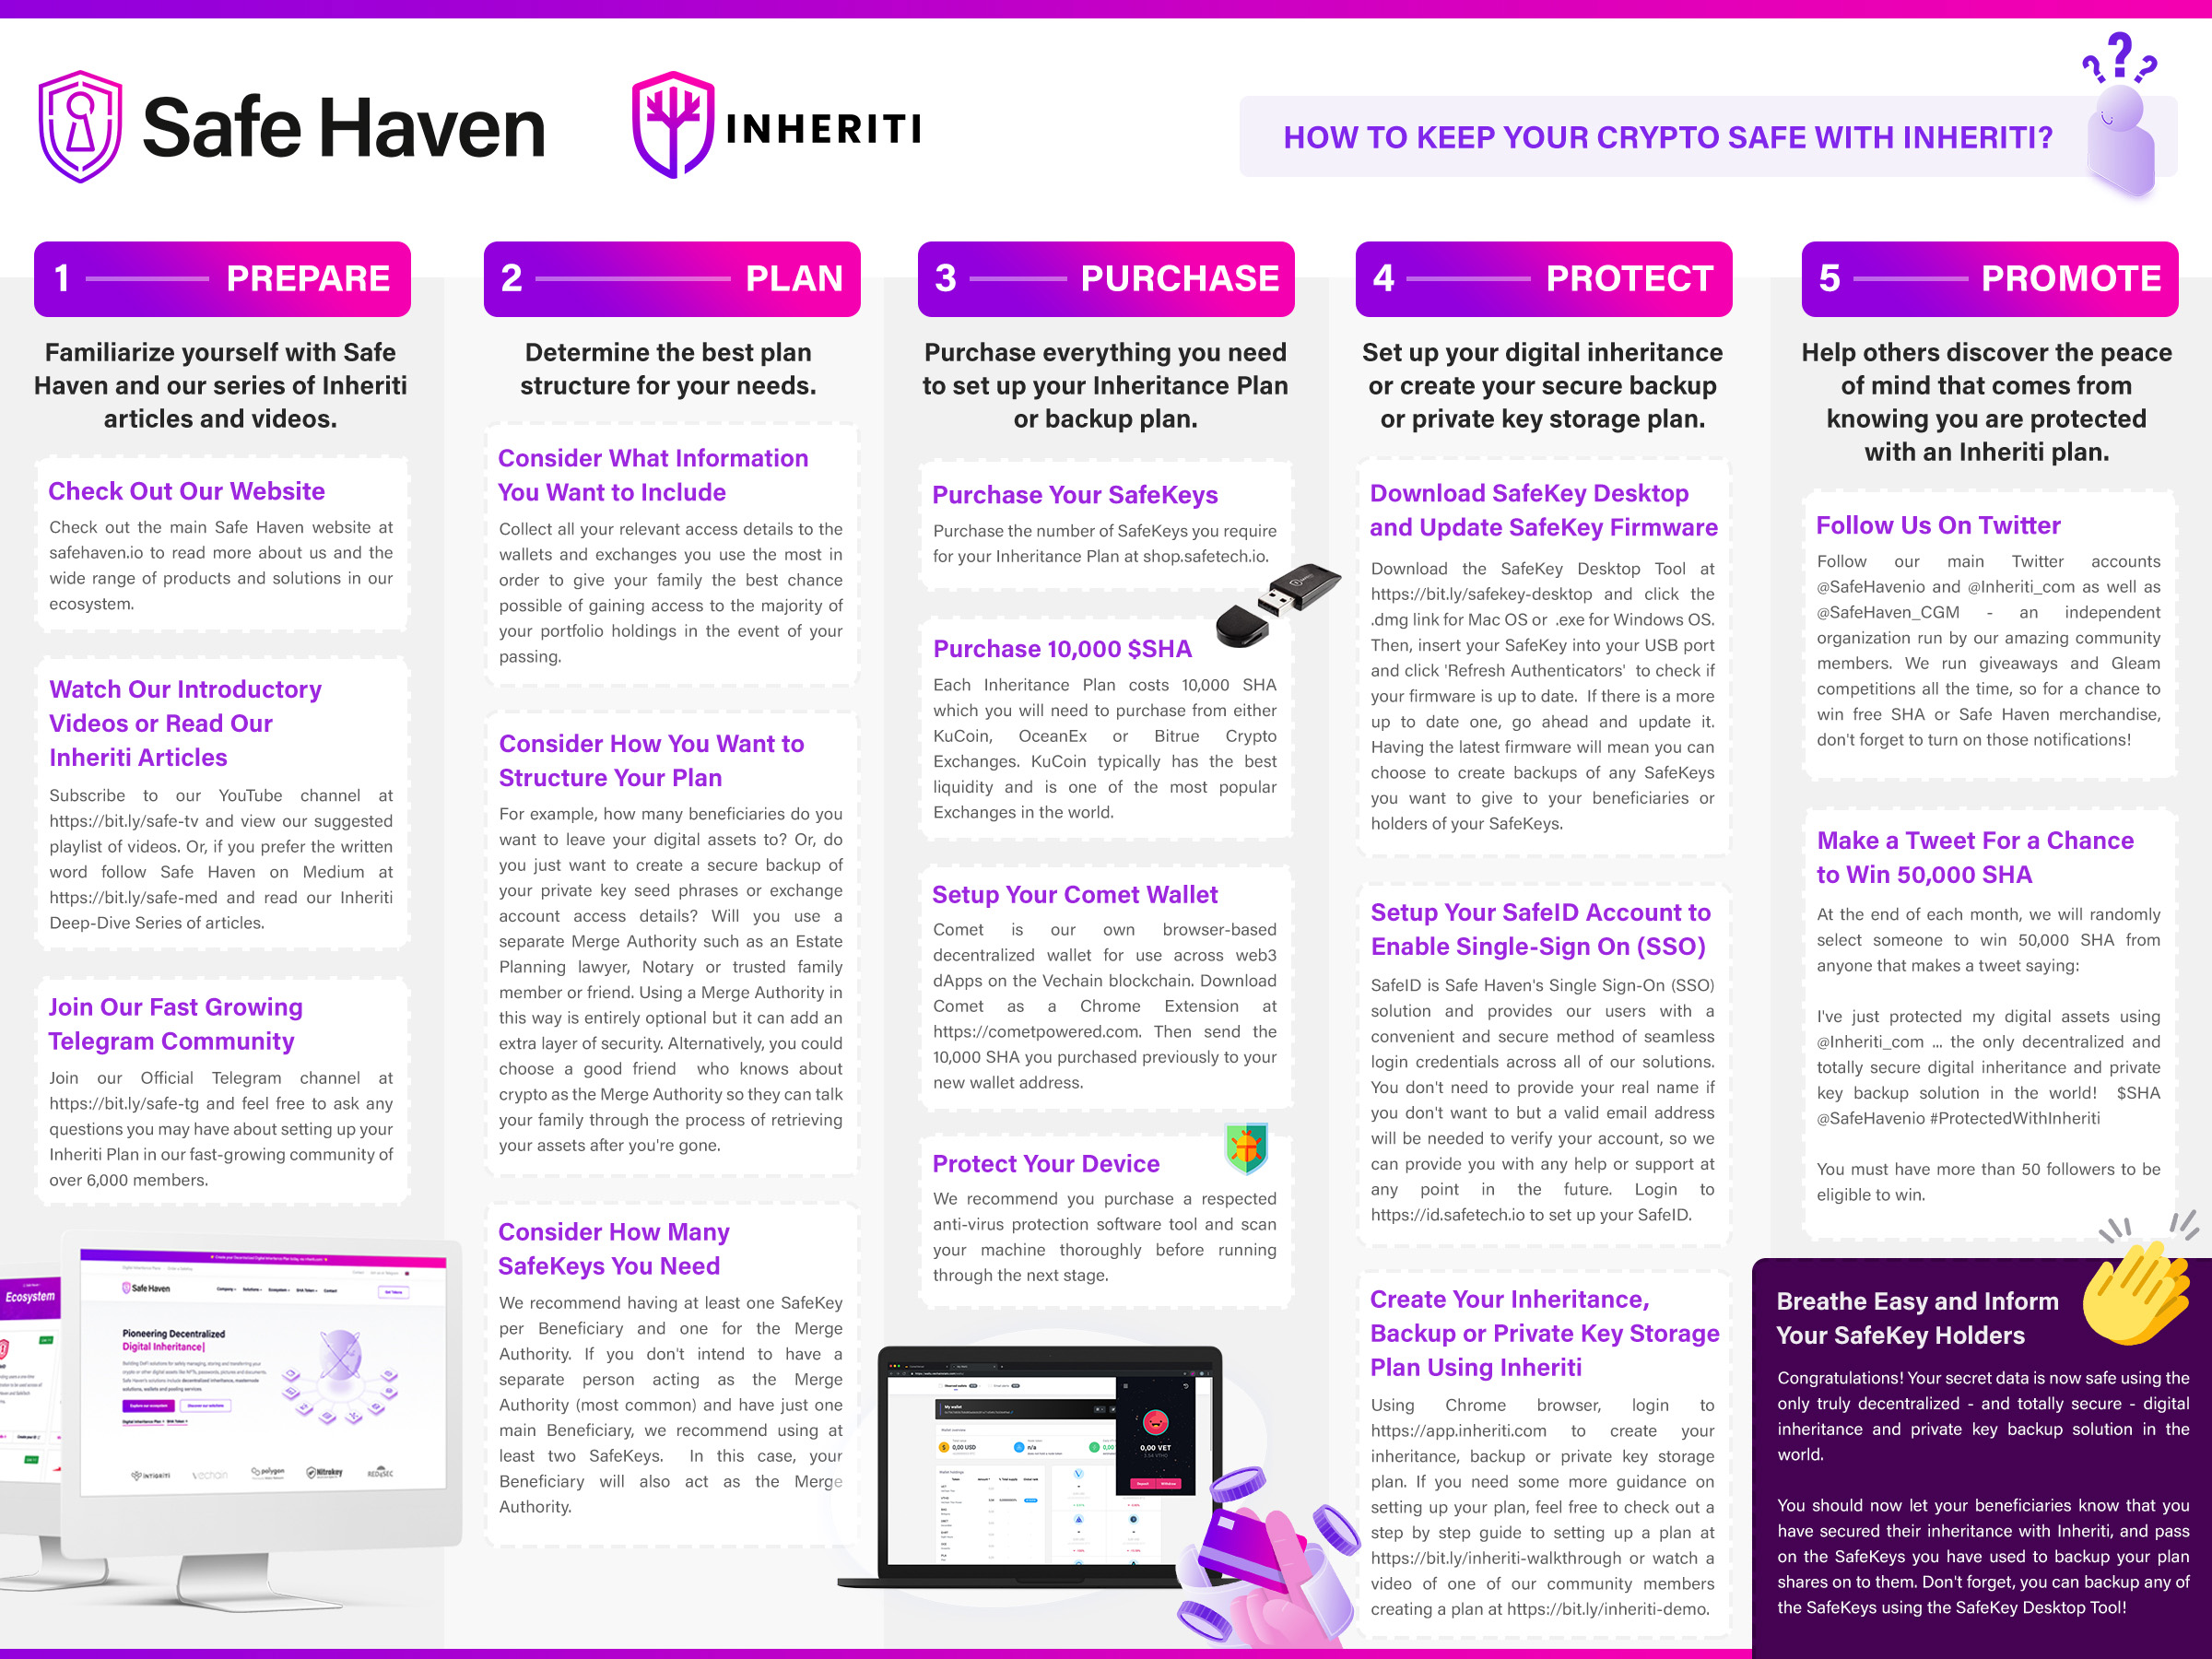
1. Navigate to Inheriti® and Create an Account with SafeID
Inheriti® is the platform where the user is able to create a decentralized inheritance plan.
Website Inheriti® Platform: https://app.inheriti.com
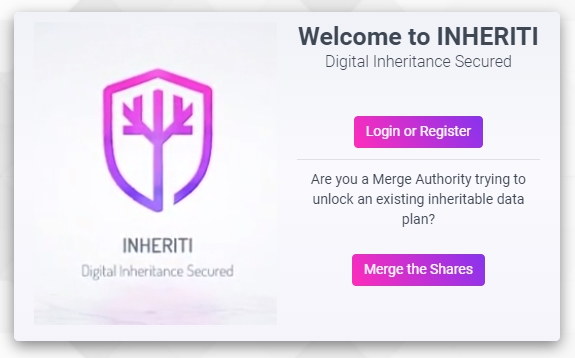
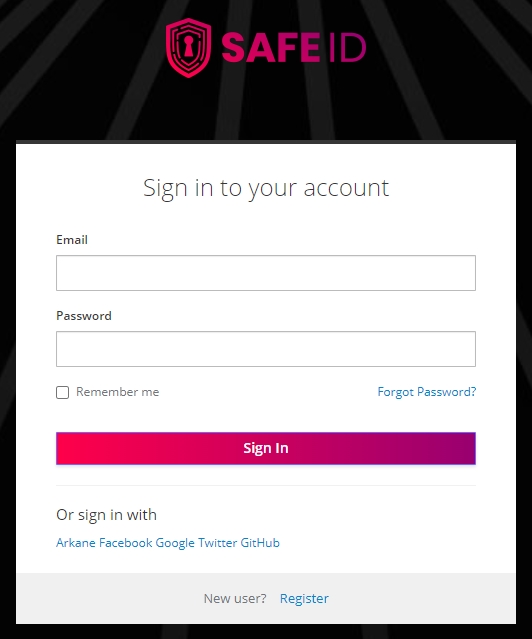
By clicking the ‘Login or Register’ button, you will be redirected to your SafeID Account.
The owner of estate or user will first establish a single sign-on (SSO) account with SafeID to access the Inheriti® platform. This SafeID account will provide access to all other Safe Haven services as well.
Upon logging into the Inheriti platform, the user will be greeted with several plan options, with only the Family Circle (Community Edition) available at current date. The Family Circle enables a user to set up a decentralized inheritance plan for a group of members, such as family and friends, or a personal backup plan to take precautionary measures for unpredictable and unforeseen catastrophes. Family Circle plans consist of four different parts: plan details, beneficiaries, activation method (DMS), and inheritable data.
If you have not yet created a SafeID account, click Register at the bottom and follow the following steps:
- Enter the correct information in the required fields and click on Register to finish creating your account.
- Once created, an account verification email will be sent to the email address you provided.
- Click the verification link in the email to verify your account.
- Your account should be successfully created and you will be taken to the Home Dashboard where you can proceed with the following step.
Note: The first time you log in, you will be asked to grant Inheriti access to your SafeID email address and user profile. Click ‘Yes’ to continue.
Website SafeID: https://id.safetech.io
2. Dashboard
When you are logged in into the Inheriti® platform, you arrive at the Dashboard.
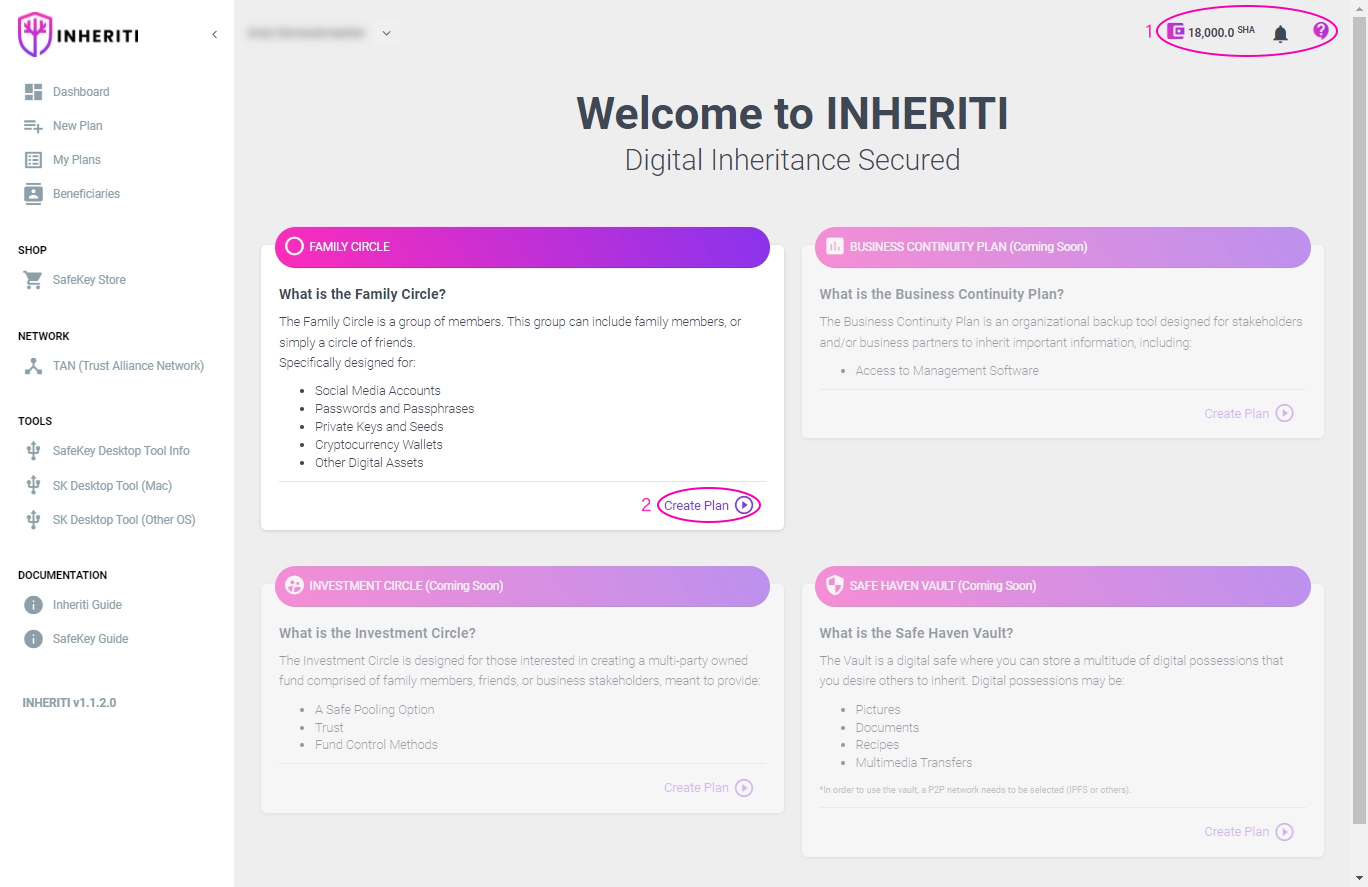
At the top right (1) in the image above, Inheriti® provides a running header displaying the user’s:
- Linked wallet’s SHA token balance
- Notification Tool
- Inheriti Support Link
On the Home Dashboard and in the navigation menu you can find the various Protection Plans (currently, only the Family Circle Plan is available) (2). To get started, click ‘Create Plan’ on the Family Circle. You will be taken to the Initiator page where you can start the Protection Plan procedure.
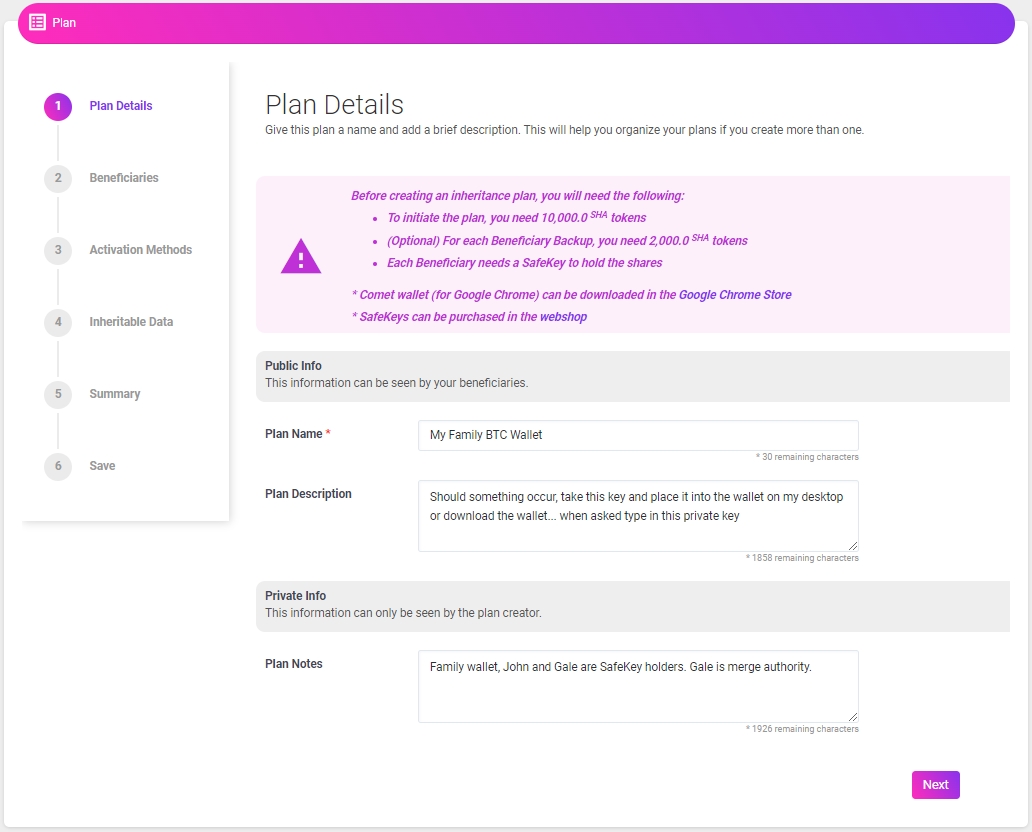
3. Plan Details
The plan details section of the platform has three different dialogue boxes – Plan Name, Plan Description, and Plan Notes – that describes the contents within the inheritance.
Plan Name enables the holder of plan shares to identify one plan from another – many plans can be stored on one FIDO2+SSDP SafeKey Hardware Security Module.
Plan Description contains notes that can be seen by beneficiaries, such as what type of data is stored within the plan.
Plan Notes contain information that is only visible to the plan creator, such as defining the beneficiaries and Merge Authority for plan.
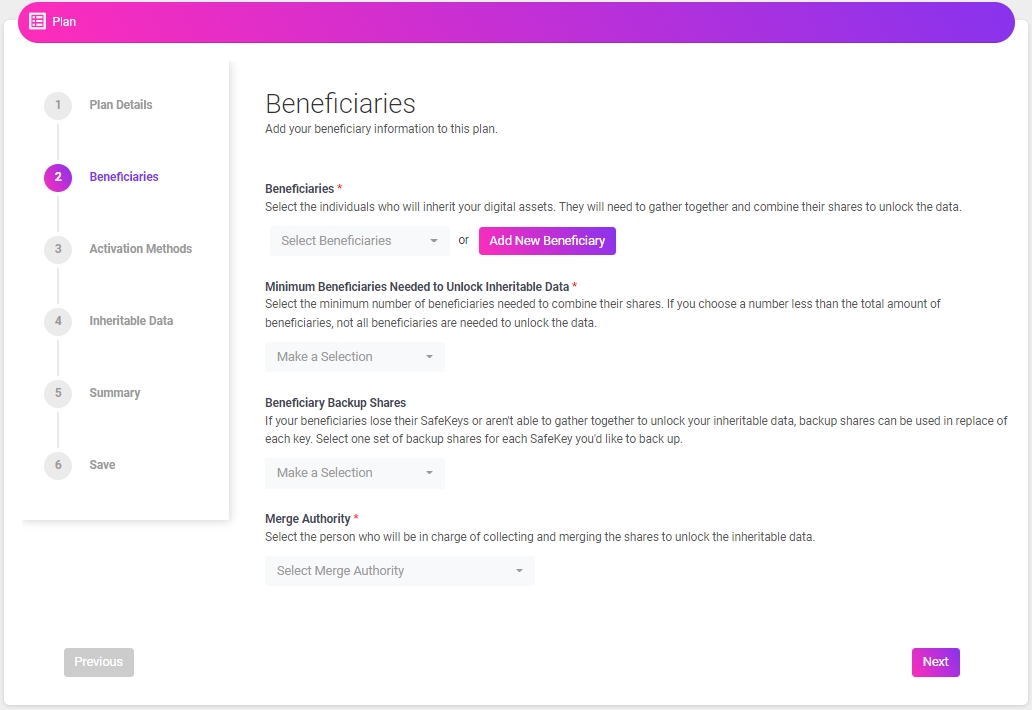
4. Beneficiaries
The beneficiary section of the platform has four different drop-down menus – Beneficiaries, Minimum Beneficiaries Needed to Unlock Inheritable Data, Beneficiary Backup Shares, and Merge Authority – that define who obtains plan shares and how many shares are required upon merging to unlock inheritable data.
Beneficiaries drop-down menu enables the user/OE to select individuals from the list of beneficiaries, or utilize the “add new” feature to add beneficiaries not represented on the list.
Minimum Beneficiaries Needed to Unlock Inheritable Data drop-down menu specifies whether all beneficiary plan shares must be present, during the merging process, to unlock the inheritable data.
Beneficiary Backup Shares drop-down menu enables the user/OE to determine how many backup shares are stored on the blockchain, which will be utilized during the merging process if plan shares of a beneficiary are lost by the holder; it is best practice to have minimal backup shares stored on the blockchain – the more backups stored on blockchain, the less decentralized the plan becomes.
Merge Authority drop-down menu is where the user/OE will select the beneficiary in charge of overseeing the merging process; the Merge Authority does not have to be an heir – estate lawyer appointment is recommended – and the individual does not have to receive a portion of inheritance.
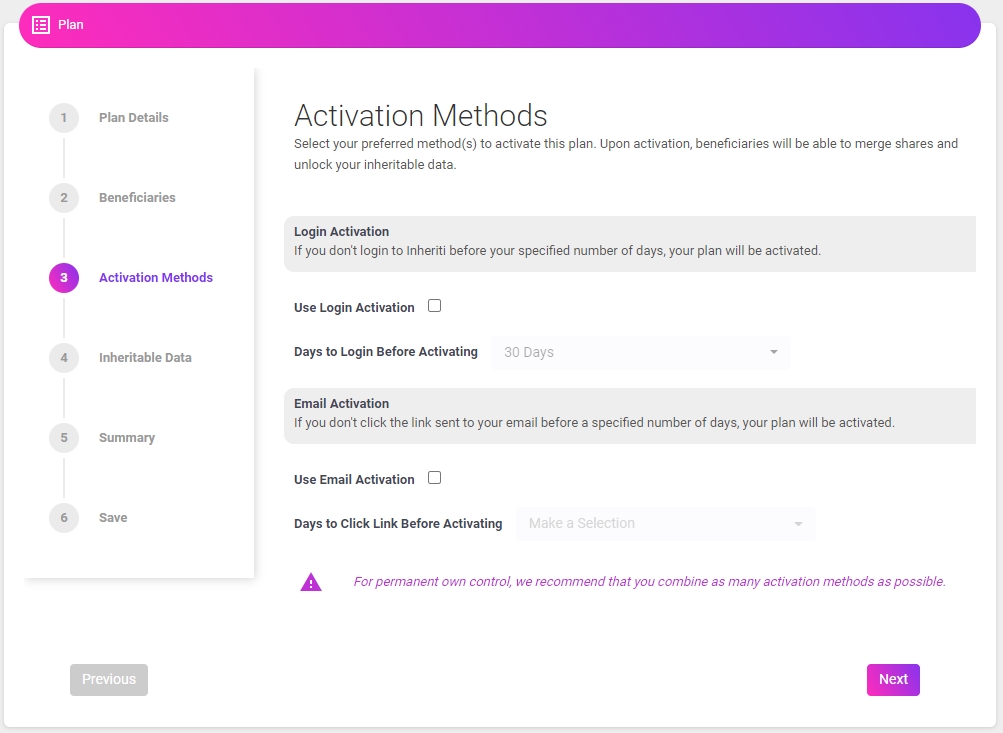
5. Activation Methods
The Activation Methods section of the platform has two different activation methods – Login Activation and Email Activation – that control release of the validator share stored on the blockchain, which is the final share required to unlock the decentralized inheritance plan. It is recommended to use as many activation methods as possible, so that you are notified the instant beneficiaries are attempting to unlock inheritance.
Login Activation requires the user to log in to Inheriti, within the amount of time specified during plan establishment. When the Dead Man Switch is triggered by beneficiaries initiating the merging process with the Merge Authority, if the user/OE does not log in within the specified amount of time, then the validator share is released from the blockchain and the beneficiaries obtain the inheritable data.
Email Activation is similar to the Login Activation, but an email will be sent to the email address registered with the Owner of Estate’s SafeID, which unlocks the validator share if unanswered within the specified amount of time.
6. Inheritable Data
The inheritable data section contains a single dialogue box for inputting critical data as text that beneficiaries are intended to inherit. Examples of critical data are private keys, mnemonic phrases, passwords for any CEX/DEX and social media platforms, special notes, song lyrics, secret recipes and/or trade secrets and many other strings of data.

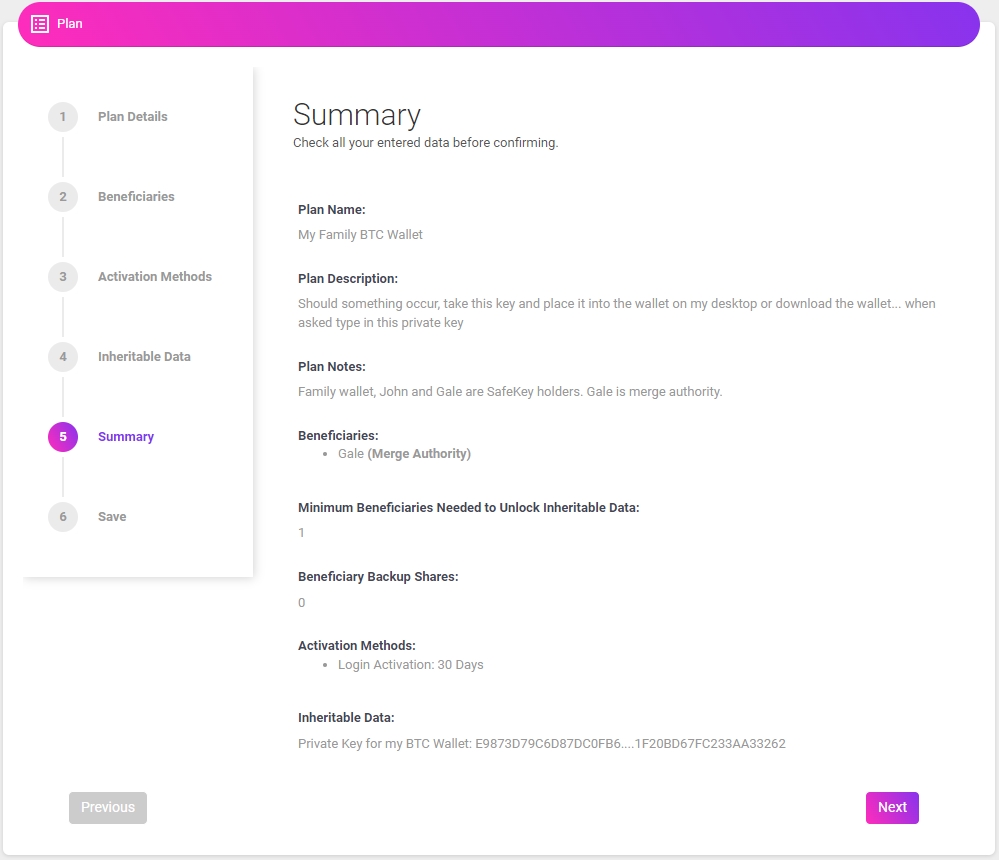
7. Summary
Before we start saving the critical data, we get to see a summary of the Inheriti® plan.
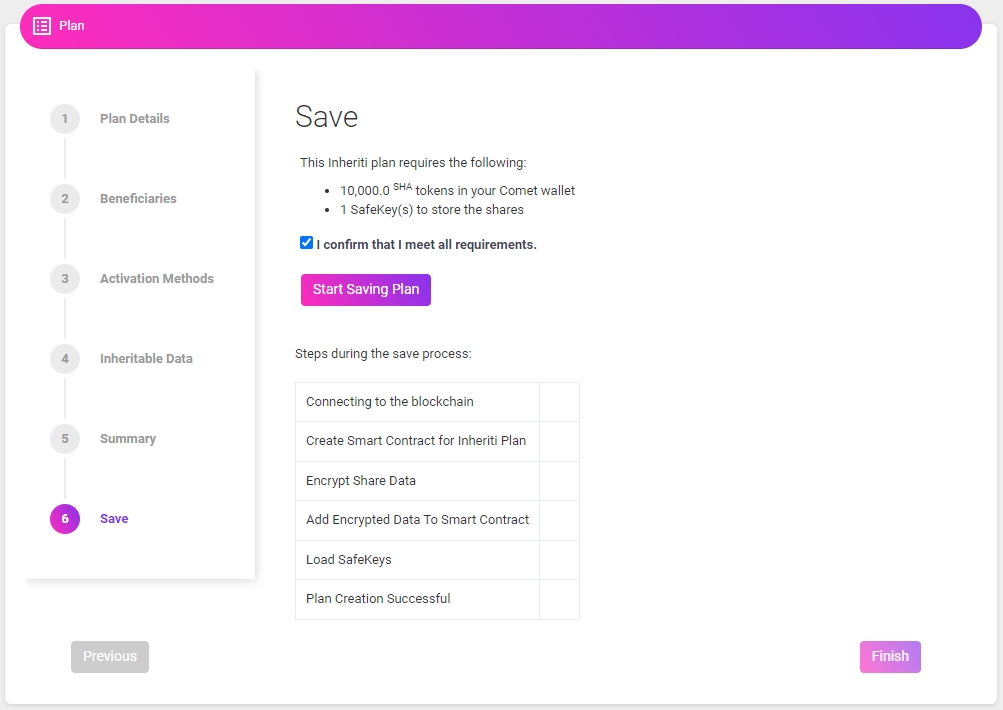
8. Store Plan Shares and Pay for Plan
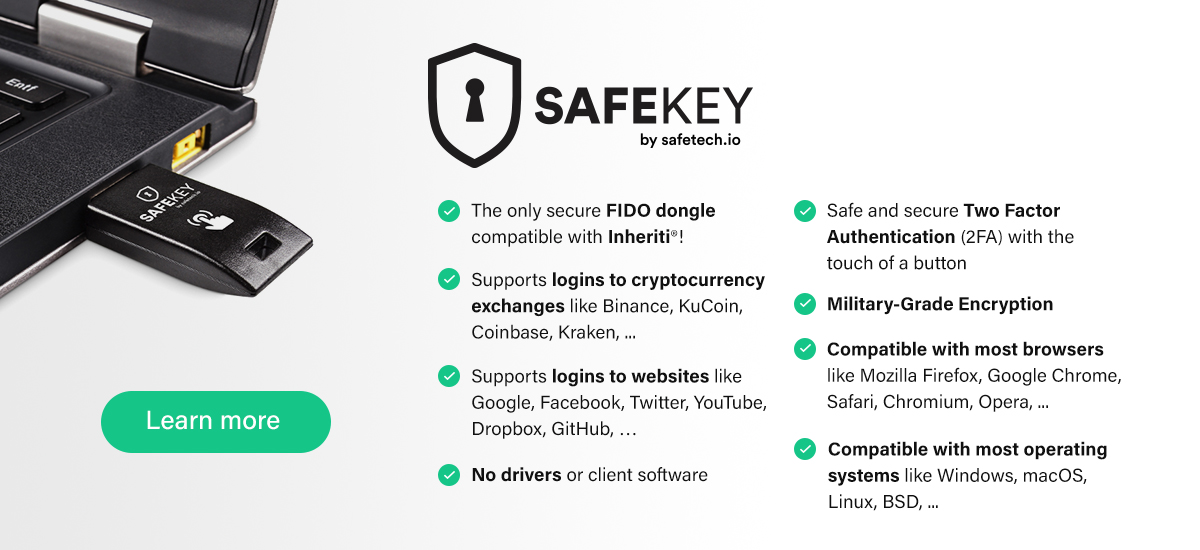
Upon setting up a plan, the user/OE will be directed to save the plan, which will initiate the Comet browser-extension wallet and request permission to pay for the plan with SHA tokens. Each plan costs 10k SHA tokens, but an additional 2k SHA tokens are required per backup share set. After the smart contract is signed, and payment has been received, the user/OE will be prompted to plug-in FIDO2+SSDP SafeKey Hardware Security Module devices – one at a time – and the encryption process begins.
Initiate the Save-your-plan process by checking the requirements box and clicking the ‘Start Saving Plan’ button.
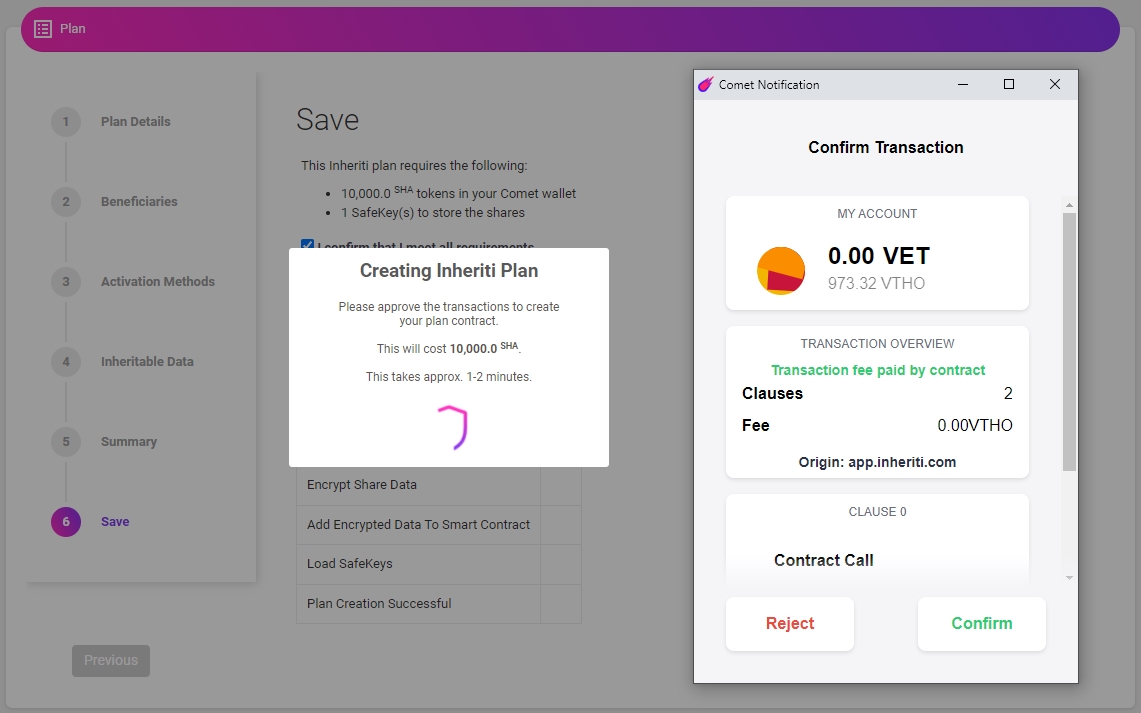
 After confirming the initiation of the plan, Inheriti® will begin to create it. It will ask you to pay 10k SHA for the Inheriti® plan. Confirm the transaction on your Comet popup.
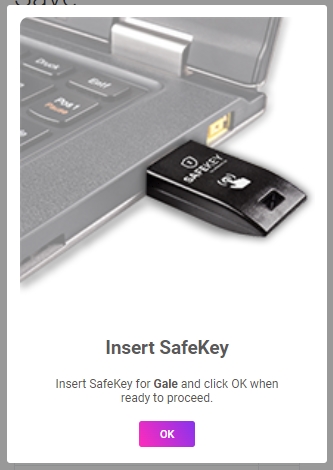
 When the payment process is done, the platform will ask you to insert 1 by 1 (depends on the amount of beneficiaries) all the SafeKeys. Insert the first designated SafeKey for the first beneficiary, click ‘OK’.
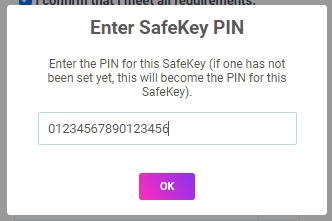
 After clicking the ‘OK’ button, you will be prompted to establish a PIN for this SafeKey. Establish a PIN. This PIN must be known by the beneficiary who will maintain possession of the SafeKey. Click ‘OK’.
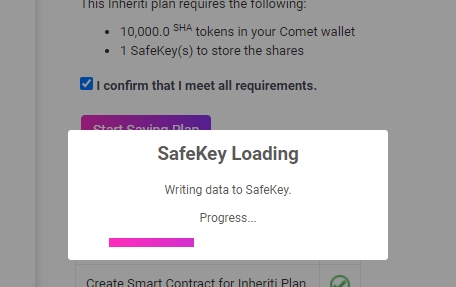
 A message will appear asking you to place your finger on the SafeKey (within a certain timeframe). The SafeKey will have a blinking light. Touch and hold the SafeKey to start writing the data to the SafeKey.
Note: When the data is being written to the SafeKey, Chrome may display popups with warning messages. This is because Chrome has a strict limit on data transmission (40bytes per chunk).
 Once the touch is confirmed, the writing process starts automatically. You will then repeat these steps for each beneficiary and their SafeKey, when prompted.
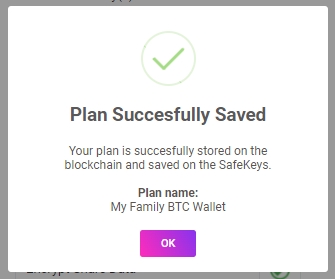
 A plan has been successfully established, click ‘OK’ to end the process.
What Encryption and Storage Methods are Utilized?
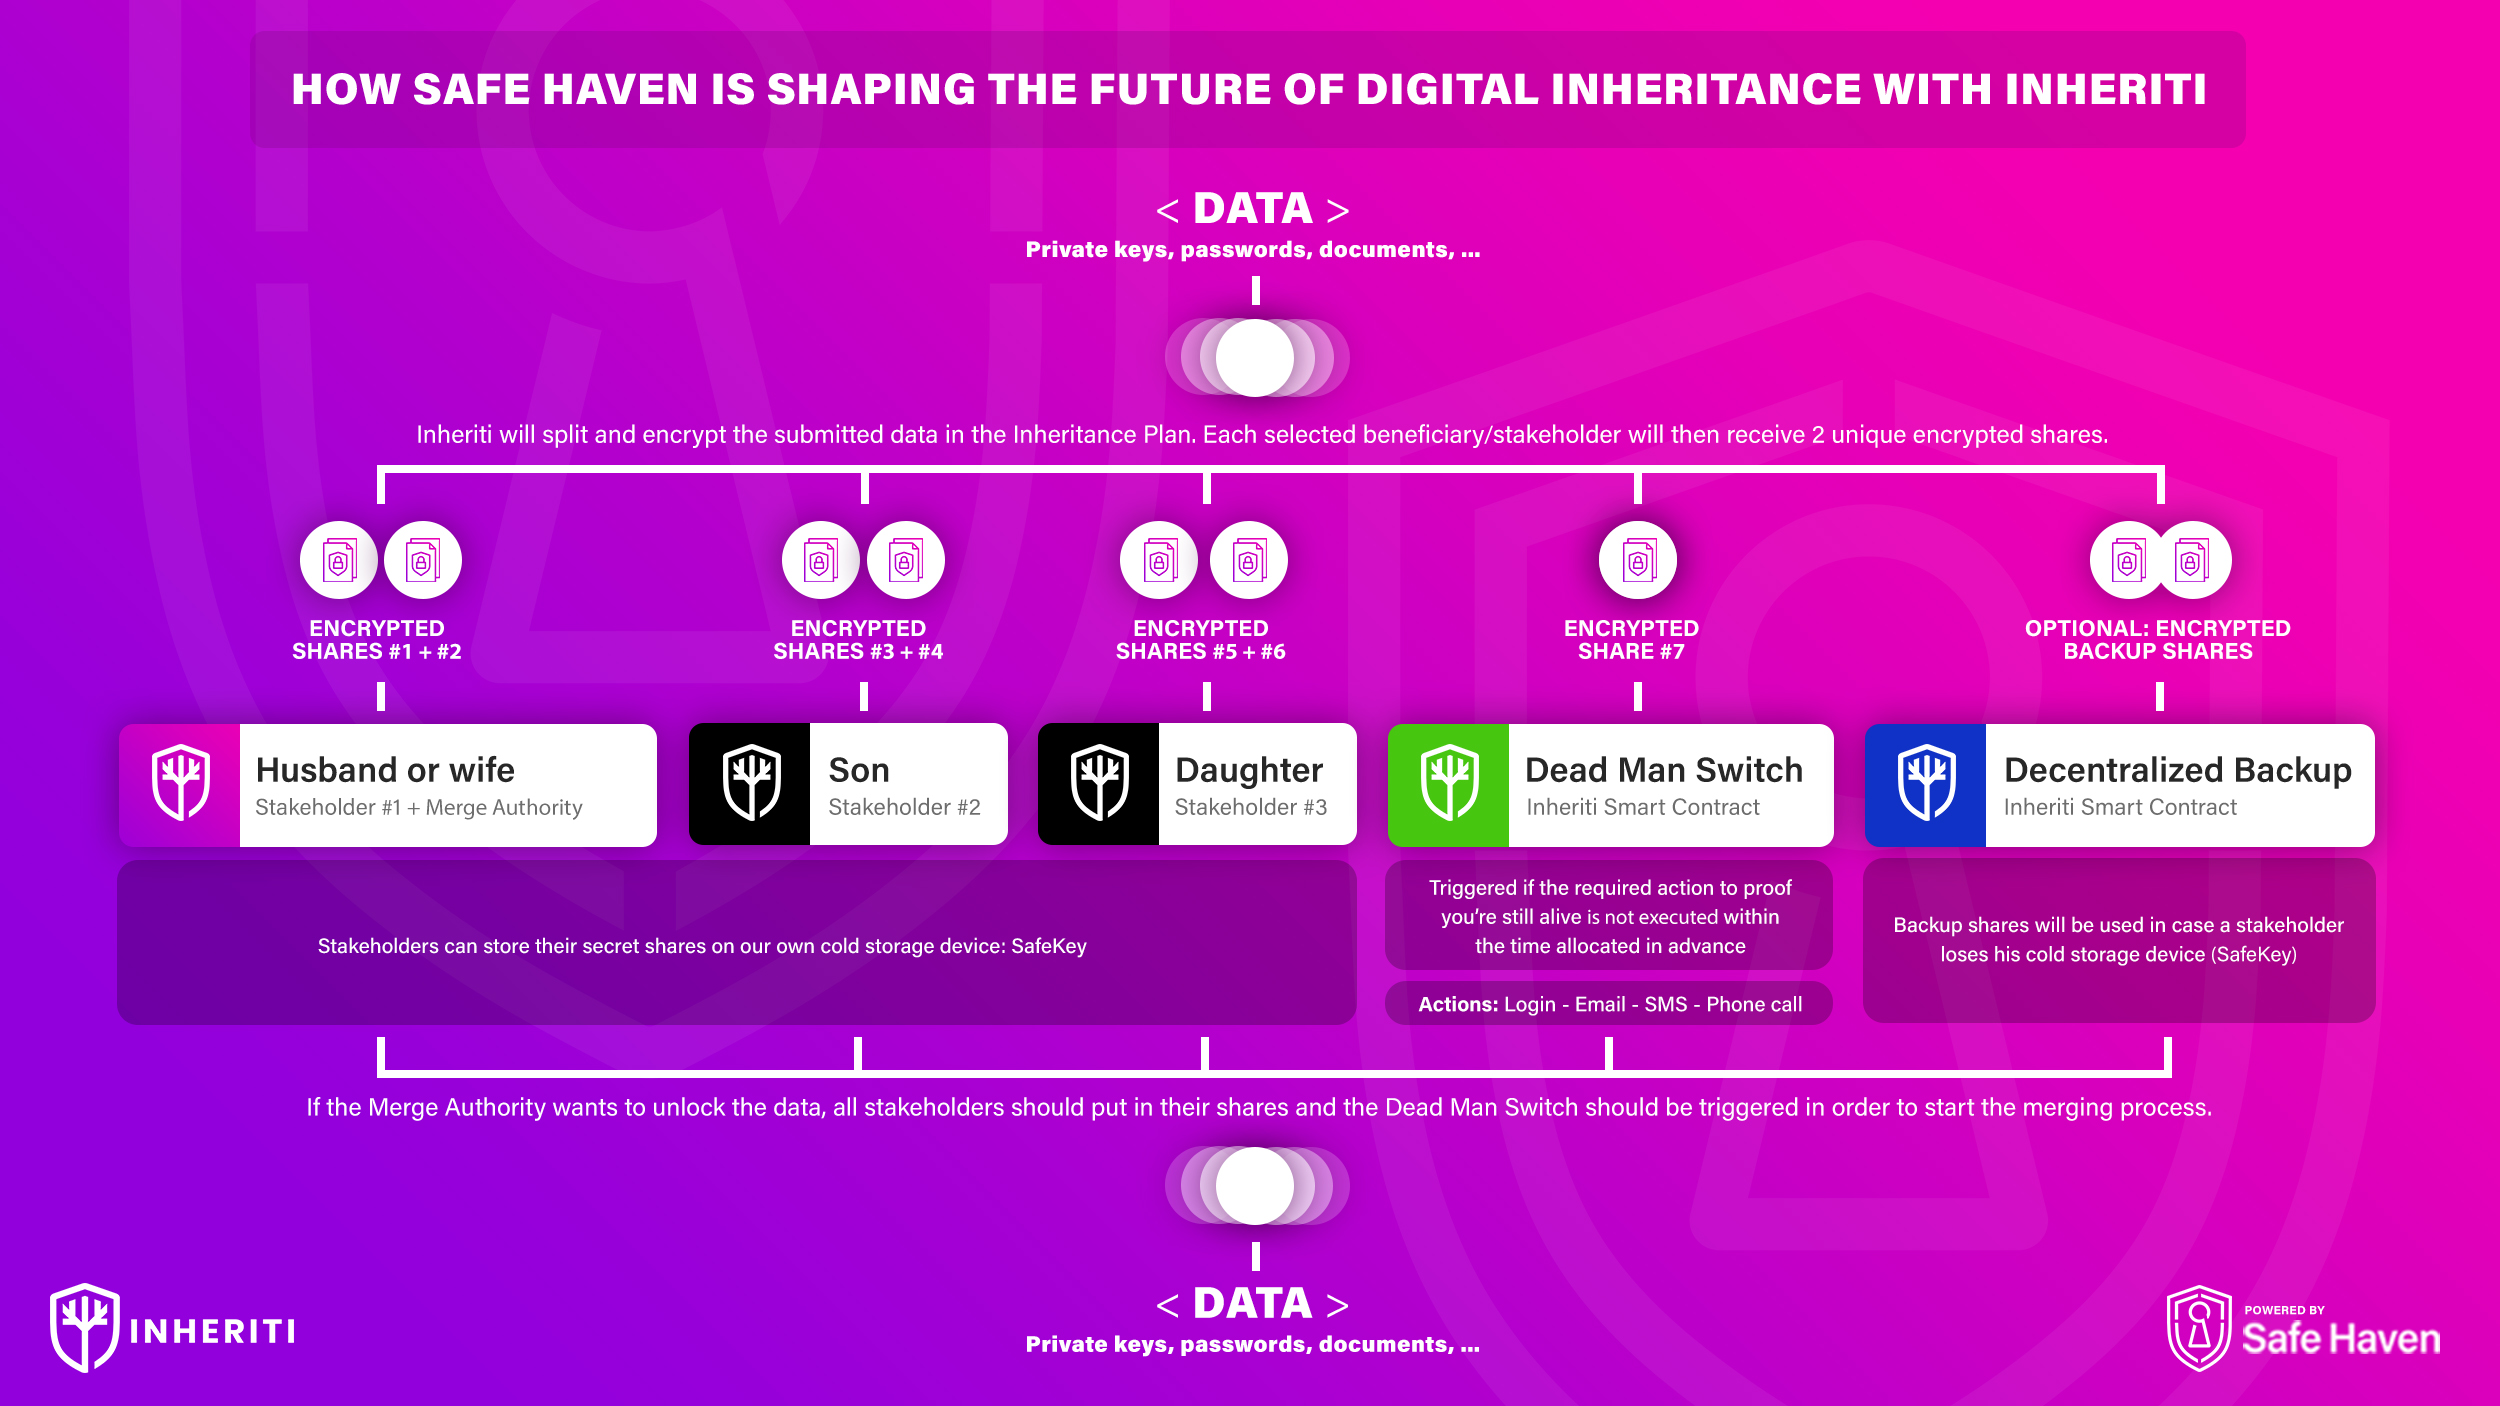
All critical data inputted within the inheritable data dialogue box is military-grade encrypted (AES-256) and fragmented into shares, most of which are utilized for cold-storage on pin-code protected SafeKey hardware devices, while the others serve as validator and/or backup shares on the blockchain. Once all plan shares are successfully stored on SafeKeys, the devices and associated pin-codes can be distributed to the Merge Authority and beneficiaries.
Back to newsJoin the Community in Spreading Awareness
As always, all of us at Safe Haven want to thank our community for your continued support.
Telegram | Telegram Announcements | Twitter | Facebook | YouTube | Reddit
Other interesting links: