The time has come to introduce the Safe Node Application and Node Activation details; a highly anticipated release for the Safe Haven community. In keeping with our roadmap, we utilized (almost) every moment that we had to ensure that this particular release left nothing to be desired. We also have stated that this release would address not only the completion of the App itself, but also afford one last opportunity for the community to position themselves accordingly prior to the snapshot date.
Node App Completion Details
As of March 26th, we received word from our Node Development team that the final testing and debugging of the Node App had been completed and that we could begin the journey towards App Store integrations. This is a huge milestone for both our company, and for you — our community of supporters and SHA holders. Those of you who have taken the time and resources to gather the SHA necessary to qualify for one (or more) of the Node levels will soon have the reward of instant maturity for your Node — more on those specifics below. Though the Node App has been completed, and the Node Maturity Snapshot will be conducted according to the timeline mentioned below, the App itself will almost certainly not be available on your mobile devices in time to witness this event from within the App itself.
Since completion of the Node App program, we have begun the public listing submittal process for our App within the respective App stores. There are two critical paths we now follow:
- Apple App Store Integration, and
- Google Play Store Integration
In an effort to release both of these versions of the Node App at (approximately) the same time, we have started with the Apple App Store submission process first. For those of you who do not know, the review and integration process for Apple is considerably longer and more rigorous than it is for the Google equivalent. In order to avoid favoritism towards one half of our community over the other, i.e. the Android users over the iPhone users, we are planning to submit the Google Play App and documentation once we have gotten fairly far down the line with Apple. We cannot represent the exact timeframes we are looking at here, but to give you an idea — submissions of this type to the Apple App Store may take 1–3+ months in review, while the Google Play Store submissions take generally 3–5 days. Our plan is to release these two apps within days of each other, or same-day, and we will continue to keep our community members informed as to our progress and public availability dates!
Node Maturity Snapshot Date
Despite this 3rd party lag time, in order to properly reward our early adopters, we did not feel it was fair to delay the Snapshot date any further. For those of you who are not yet familiar with this concept, the Snapshot date refers to the day your Node-specific amount of SHA will need to be stored within your VeChainThor Wallet in order to waive the maturity period.
The Node Snapshot Date is: May 1, 2019, 1300 UTC
As promised, this announcement gives you just over one month to complete whatever transfers need to be made so that you can arrange to have your SHA safely stored within your VeChainThor Wallet in time to be rewarded.
Please keep in mind that once the Snapshot takes place, you cannot remove an amount of SHA that will decrease your Node Level without needing to wait the full maturity period to re-establish that Node level. This Snapshot will only occur once, after which time the required Node Maturity is hard-coded into the smart contracts and cannot be waived. This, of course, is the crux of the trustless nature of decentralized operations — and while it makes sure that everything remains fair to all of our Node Holders, it does mean that no amount of customer service assistance can help you if you accidentally move SHA from the linked wallet.
IMPORTANT DETAIL FOR MULTIPLE NODE HOLDERS: For those within our community that are choosing to break up their SHA balance in order to qualify for MULTIPLE NODES, e.g. a Harbor Node AND a Connect Node, you will be required to establish MULTIPLE WALLETS within your VeChainThor Wallet — as Node is not programmed to automatically divide your total SHA balance in a single linked wallet address into the maximum number of nodes possible. If you need assistance in completing this process, please reach out to a moderator within the Safe Haven Telegram Channel and they will assist you in accomplishing the task. Again, this is a major reason we are giving ample notice before your linked wallet(s) must be prepared.
Node Application Sneak Peek and Tutorial
Since we are currently waiting for Apple and then Google to start and finish their respective due diligence and listing processes, we wanted to give you a sneak peek into the Node App itself so that you get a feel for what is coming at public launch. This way you will be ready to go native in the application itself immediately once the App is available to you. Below are screen shots of the finished product with some commentary, when necessary, as to what you are looking at and what will be expected of you when the day comes that you have downloaded the App onto your mobile device.
The Start Screen: Nothing to explain here, but simple and elegant design with a lot going on underneath the hood (much like Safe Haven itself). No doubt you will get used to seeing this on your phone once the Node App becomes listed!

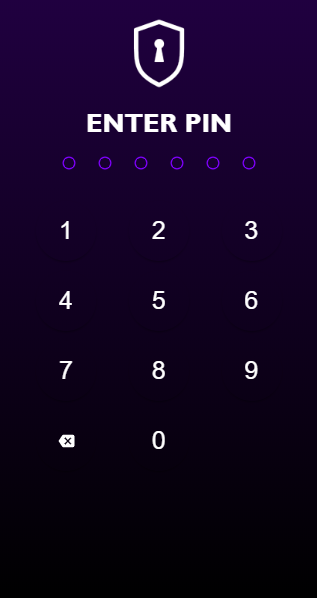
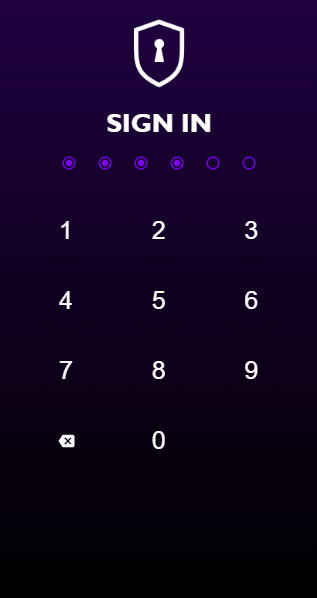
Sign In Screen: As you enter the Node application, you will find it necessary to establish a 6-digit pin. This pin will be used to enter the application for all future logins. Please be sure to memorize your selected pin. If you are the type that forgets things, you may want to write this pin down on a piece of paper that you keep in a secure location.
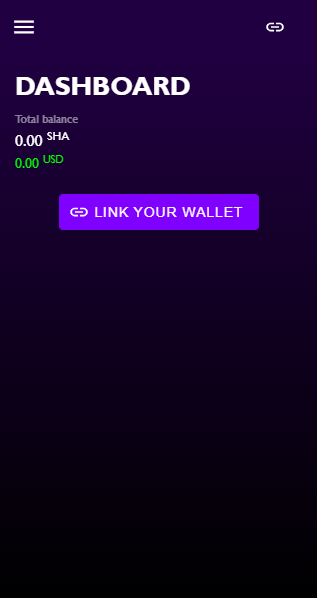
Dashboard: Once you have signed in via your 6-digit pin, you will find yourself at in the Dashboard area of the Node App. Eventually this will be your control center for the Node(s) and wallets you hold/link. For now, you will simply see a zero balance, as nothing has yet been linked to your particular App. In order to proceed, you will click on “Link Your Wallet”.
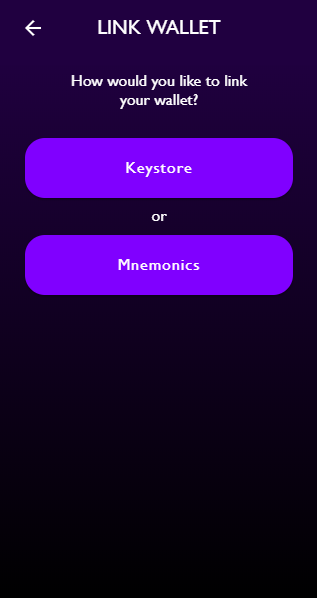
Link Wallet Screen 1: On this screen you will be prompted to link a wallet. Remember that you can link multiple wallets, however you will do this one at a time. There are two predefined methods of linking a wallet address, either via Keystore or Mnemonics.
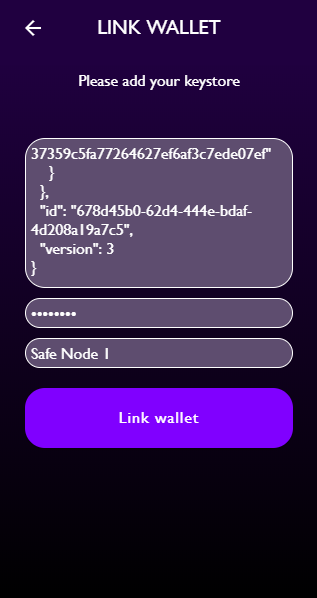
Link Wallet Screen 2: The look of this page will be based on which method you chose on the previous screen. In the example below you see that the “Keystore” option was chosen, and thus that information is entered into the fields, along with the desired name for this wallet.
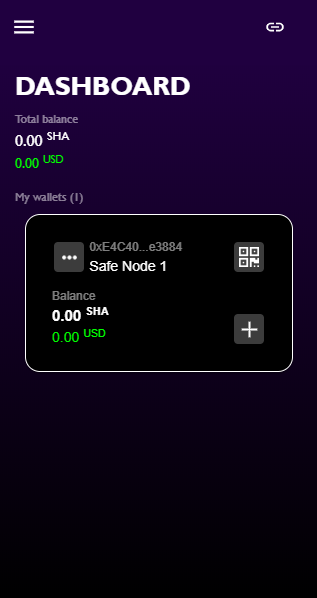
Dashboard with Linked Wallet: Now that you have successfully linked a SHA wallet to your Node App, your Dashboard screen will reflect that wallet. Notice that the name you chose in the bottom field on the previous screen is shown as the wallet name on your Dashboard.
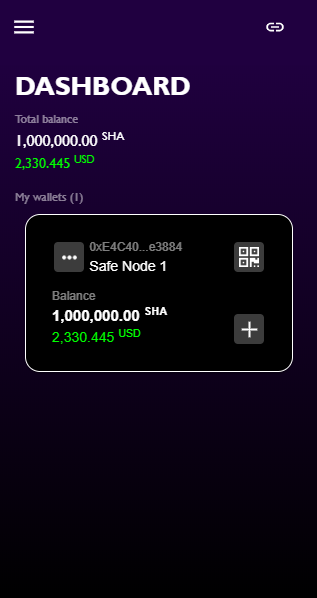
Dashboard with Linked Wallet (Complete): Once your wallet has finished linking, you will see the SHA amount and USD equivalent. At this point you may link a second wallet if you wish to qualify for multiple Nodes or simply would like to be able to view multiple wallets here.
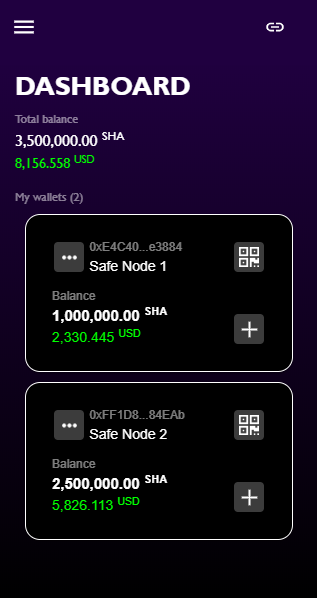
Dashboard with Multiple-Linked Wallets: Once you have linked all of the wallet addresses you wish to represent within the Node App, your Dashboard screen will look like this. You will notice that each wallet displays the amount of SHA and USD equivalent value, and that the combined SHA amount for all linked wallet addresses is totalled at the top of the screen.
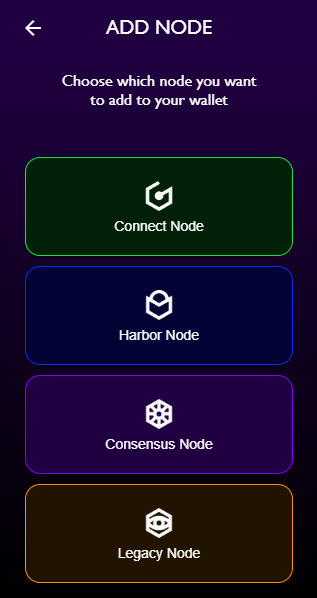
Add Node Screen: By clicking on the “+” button in any linked wallet, you will be directed to this “Add Node” screen, where you may select any node that your wallet amount correlates to.
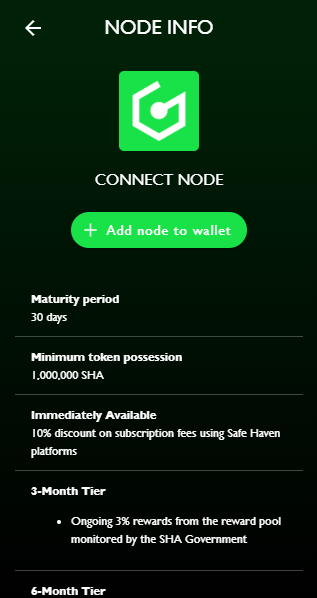
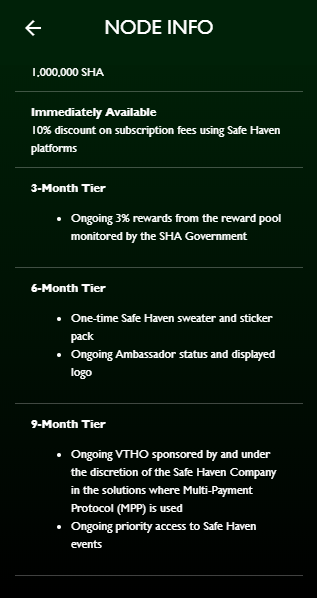
Node Info Screens: When you select any of the Nodes from the previous screen, you will be taken to an informational screen that shares all pertinent details about the Node you are selecting. You may scroll down this screen to see more information. Make sure that you understand the info on this screen before making your selection, and when you are ready to proceed with activating your correct Node level, simply hit the “+ Add node to wallet” button.
Safe Node Selected/Active Screen: Once you have selected the Node level you would like to apply to your linked wallet, you will see that the wallet now can be clicked on in order to show the Node Icon and level, as well as a countdown timer for maturity purposes and rewards that you have earned and/or are able to claim. You will also be reminded of upgrades that are possible within this screen once your maturity level has been hit for a designated Node level, in the example below you see that since this Connect Node has reached its 30 day maturity period, it is eligible for an upgrade to the Harbor Node status, assuming an additional 1,500,000 SHA is added into that linked wallet. Once the proper amount of additional SHA is placed within the linked wallet, the Node Upgrade is a simple Single-Click Feature of the ecosystem.
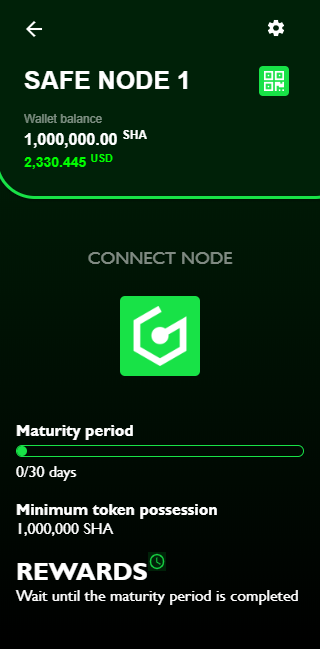
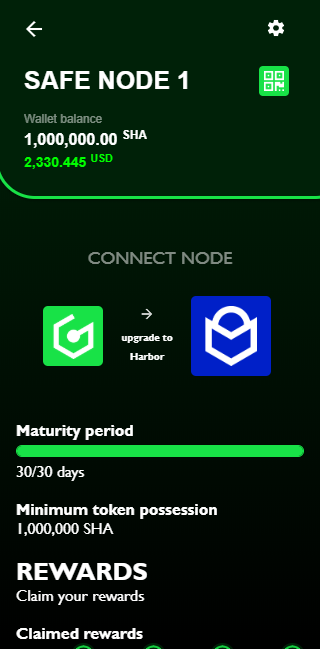
Tutorial Conclusion: Well, that is the extent of the Node app as it exists in this initial build — we hope you have found this short tutorial clear and concise. Once the Node App itself is released onto the App Stores, you may want to come back and reread this article to make sure that you take the proper steps to link your wallet(s) and activate your Nodes. Keep in mind that for those of you who made Snapshot deadline, you will not be faced with the maturity period countdown, but instead will be shown instantly accredited Node Level Activations.
Since it has been a while since we discussed the Safe Nodes, we wanted to go over a few reminders and clarify a few questions that have come up in our Telegram channel.
First of all, let us reiterate these points:
- Node maturity period is reset if one decides to downgrade their node status
Note: Downgrades that occur accidentally will cause this to occur, use caution!
- Everything is coded into the smart-contract, thus there is no editing node functionality
- Safe Nodes provide no form of voting rights or decision making advantages
- Upgrading a node is subject to maturity and to tiered progressions
- It is possible to obtain multiple product awards (eg: sweaters/FIDO) from upgrading
Now we will address other great questions that have come from our community:
- If I accidentally erase my Node App on my phone, or my phone gets stolen, will I lose my node status and have to start the maturity period over again by re-linking my VeChainThor wallet?
No, you will not have to restart your maturity period over again — only go through the steps to re-link your wallet. The maturity period will reflect the same as it did before the loss, as it is determined based on the smart contract written in behind the scenes and not simply based on the graphic representation of your Node App.
2. Will my Pool Reward SHA be automatically deposited into my VeChainThor wallet? Will I receive some sort of ledger to reflect this? Do I personally need to “accept” or “claim” Pool rewards as I would claim NEO gas? Or is it passive?
All Pool Rewards will be passive in nature and distributed on a monthly basis to Node Holders, based on their Node level.
3. Can I have the Node App on my desktop AND on my phone?
At this point in time, the Node App is strictly a Mobile app and there is no desktop version of the App to utilize. We do not currently have plans for a desktop version, although that remains a possibility for the future if our community makes a strong case for it.
4. Where do I submit service tickets for issues I face within my Node App?
Anytime you may need assistance with the application, you can submit questions to our moderators within the official Telegram chat, as this is the best way to receive timely and knowledgeable assistance.
As always, we also thank our community for your continued support.
Back to newsJoin our Official Telegram Channel: https://t.me/safehavenio
Follow us on Twitter: https://twitter.com/safeHavenio

 Nederlands
 Deutsch
 Français